How to Create and Manage Point of Sale Users and Cashiers in Invent ERP
Learn how to create POS users, assign permissions, control cashier access, and manage retail staff across multiple branches and terminals.
Step-by-Step Process
Create a USer
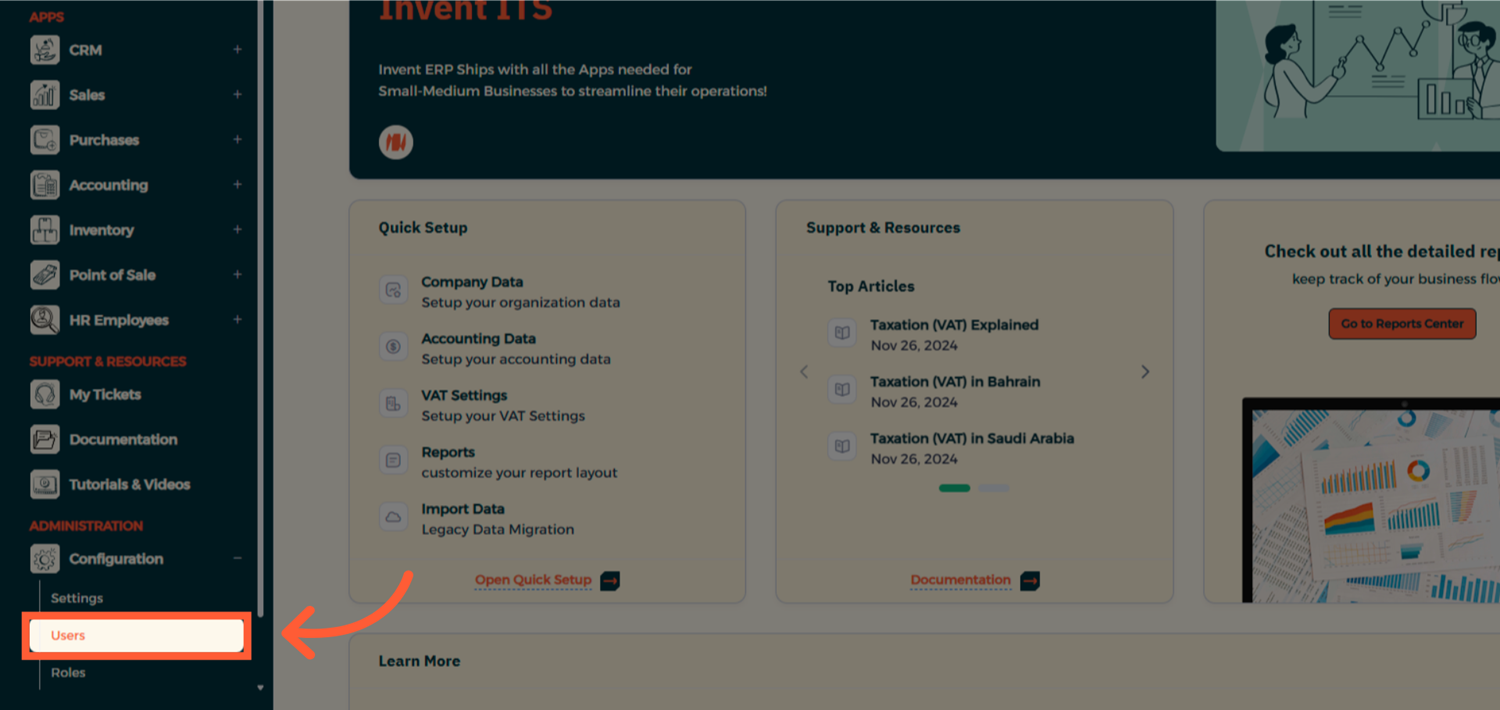
Step 1: Head to Users
From the Main Menu, go to Configuration → Users.
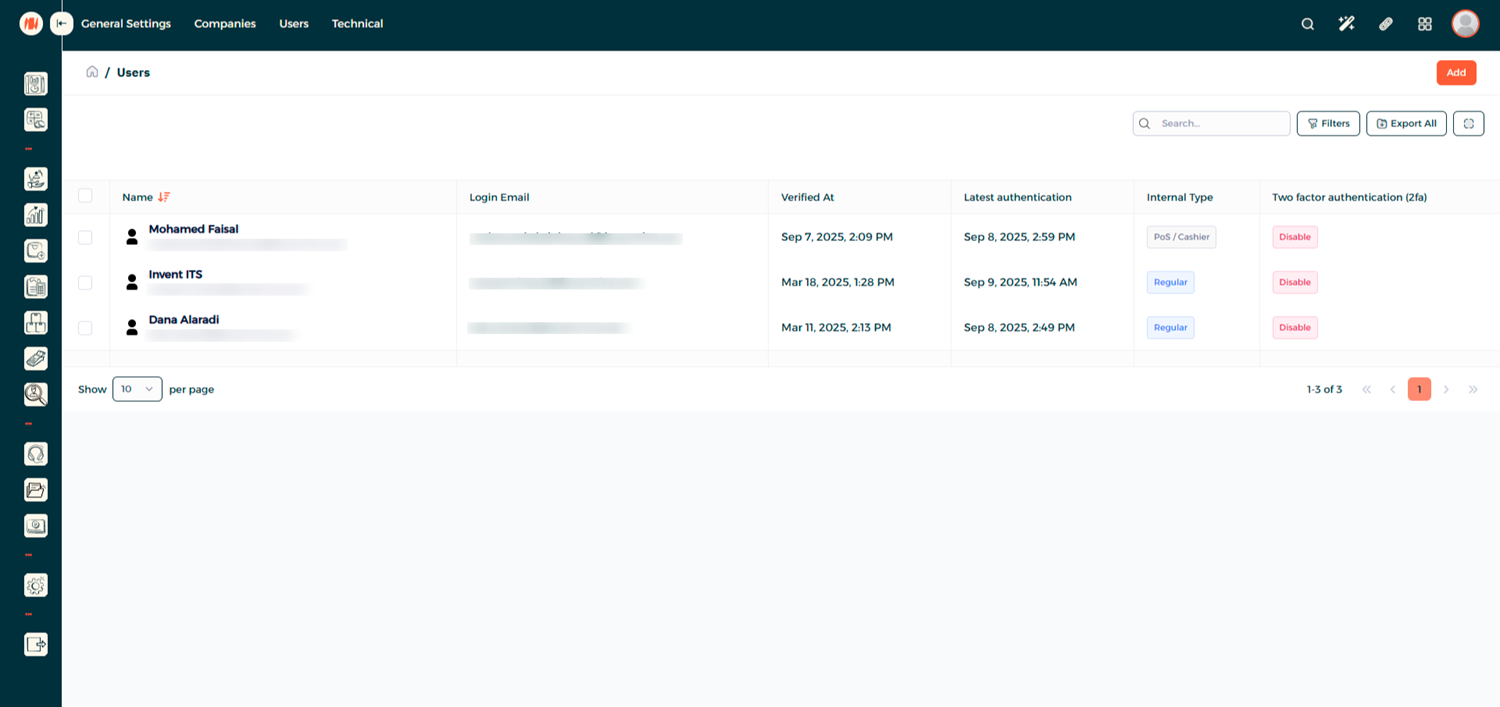
Step 2: Add a New User
From the Users List, click Add to create a new user
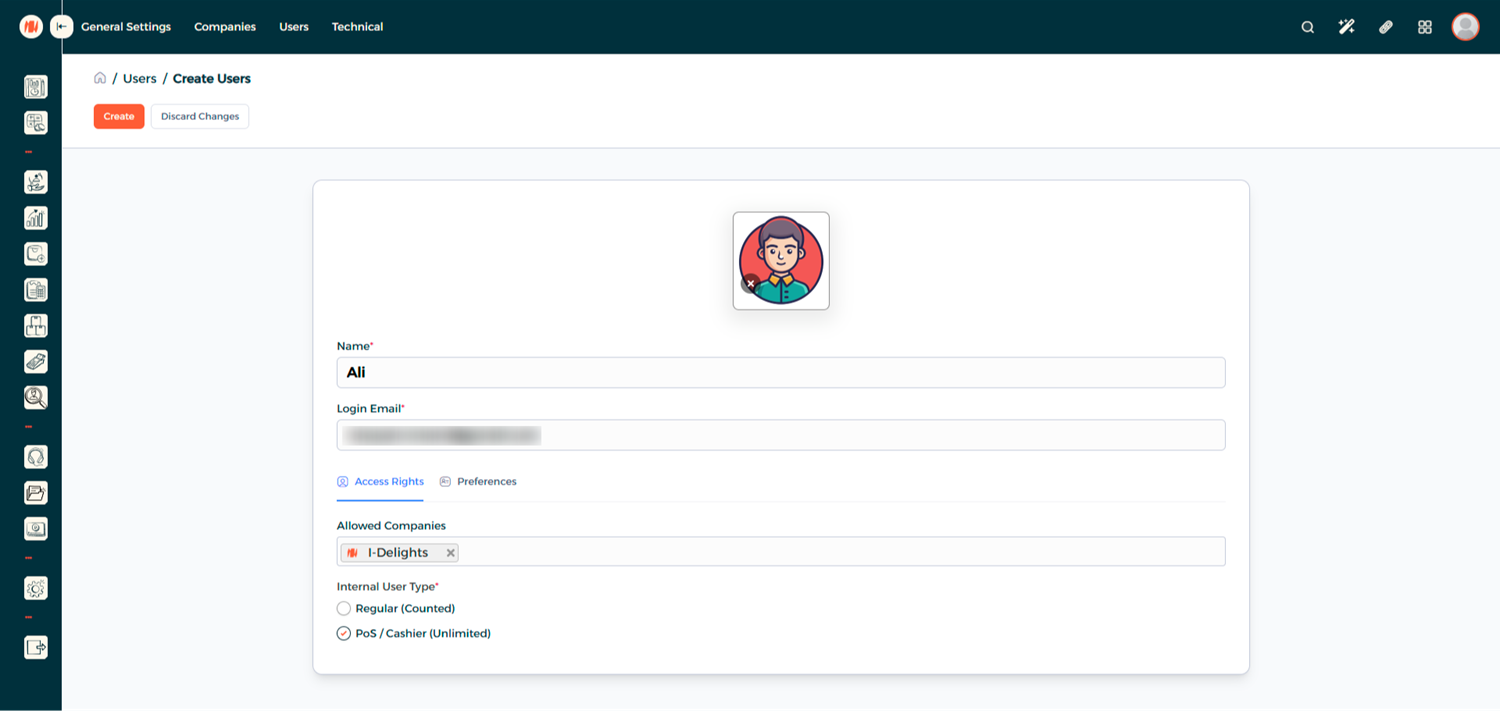
Step 3: Fill the Details
Fill in the user details, then mark the user as POS User to grant access to the POS.
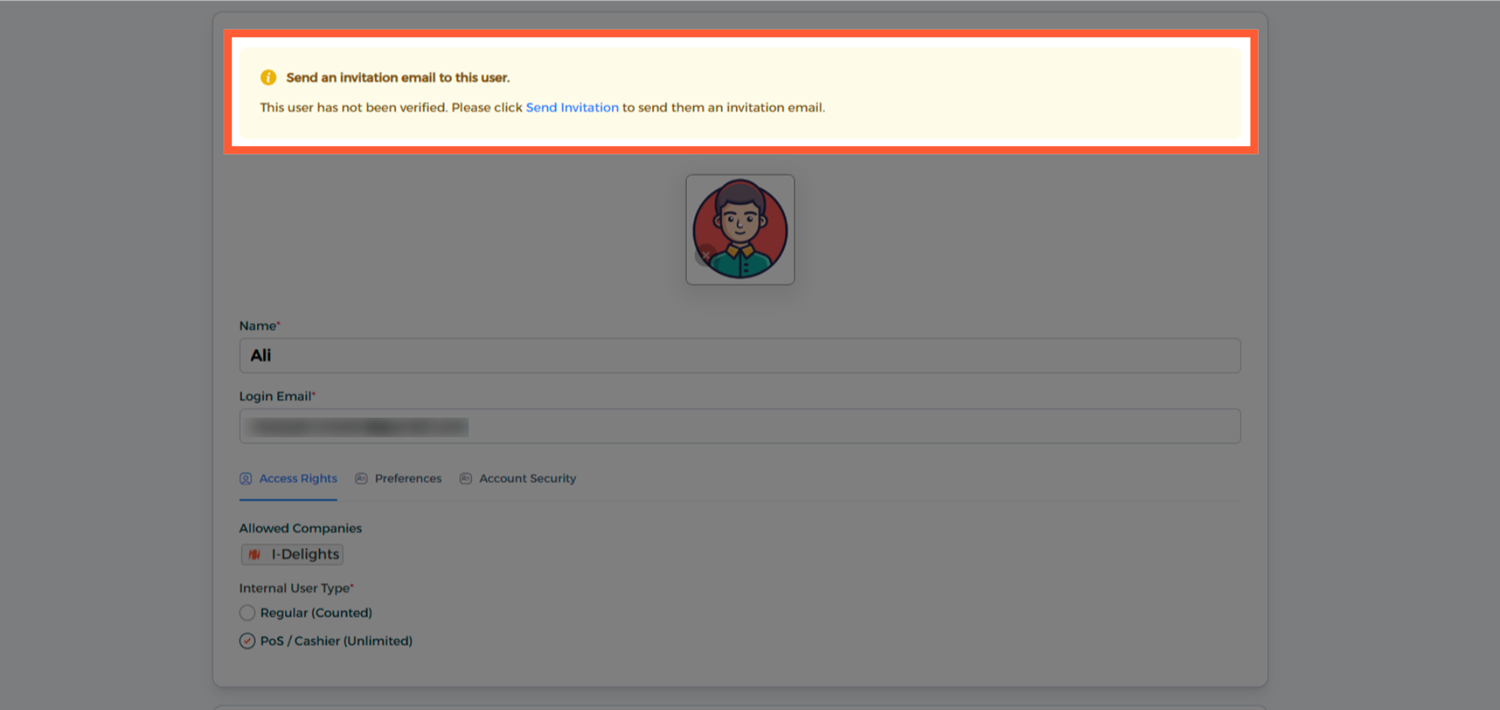
Step 4: Send Invitation
After creating the user, send an invitation so they can active their account.
Create an Employee Profile
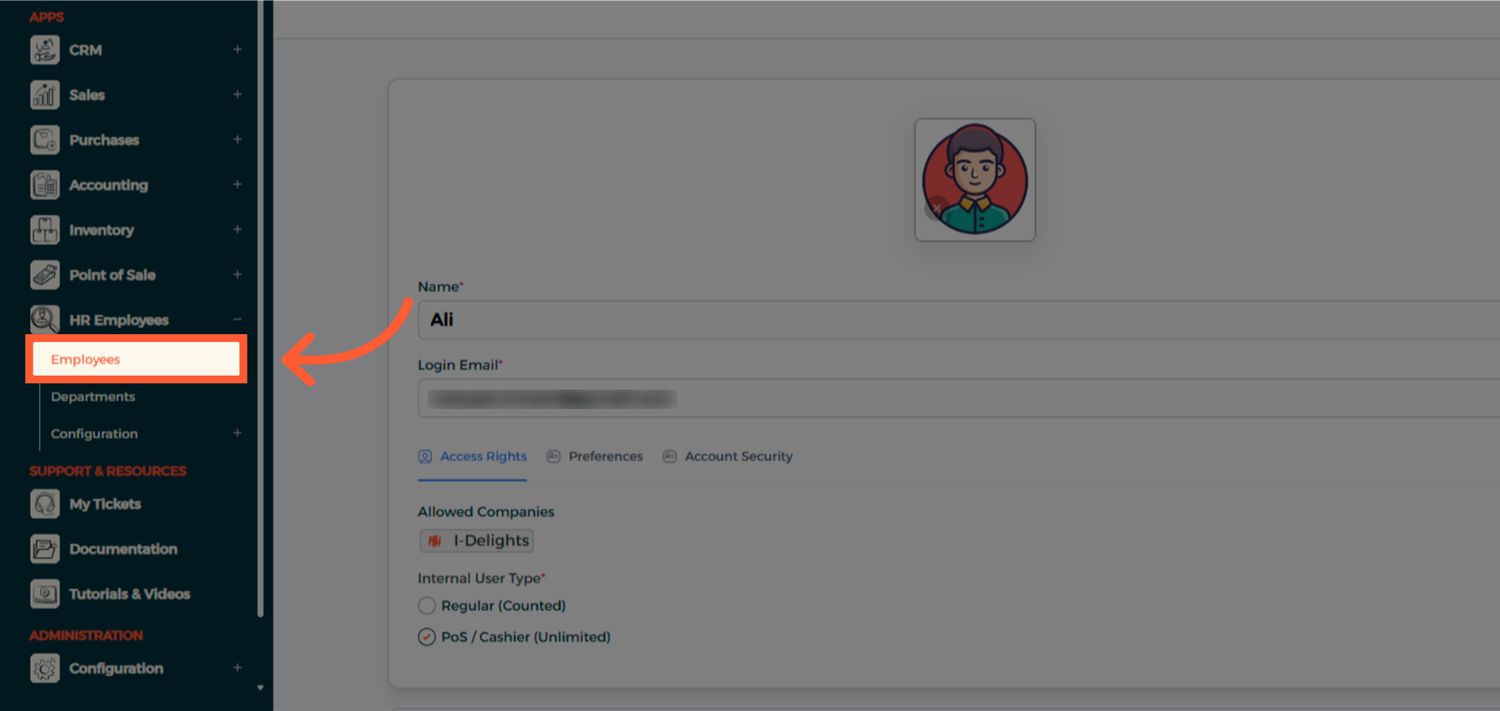
Step 5: Head to Employees
From the Main Menu, navigate to the HR Employees → Employees.
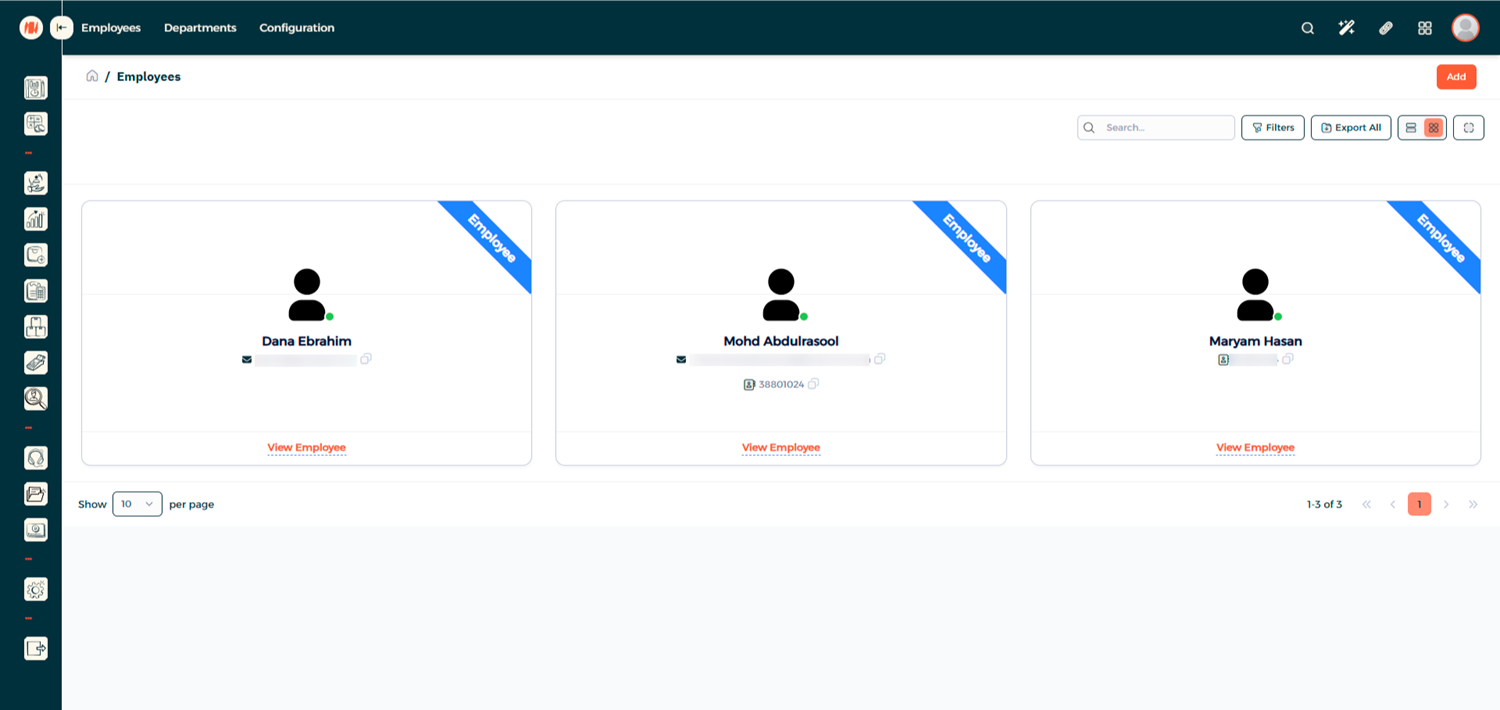
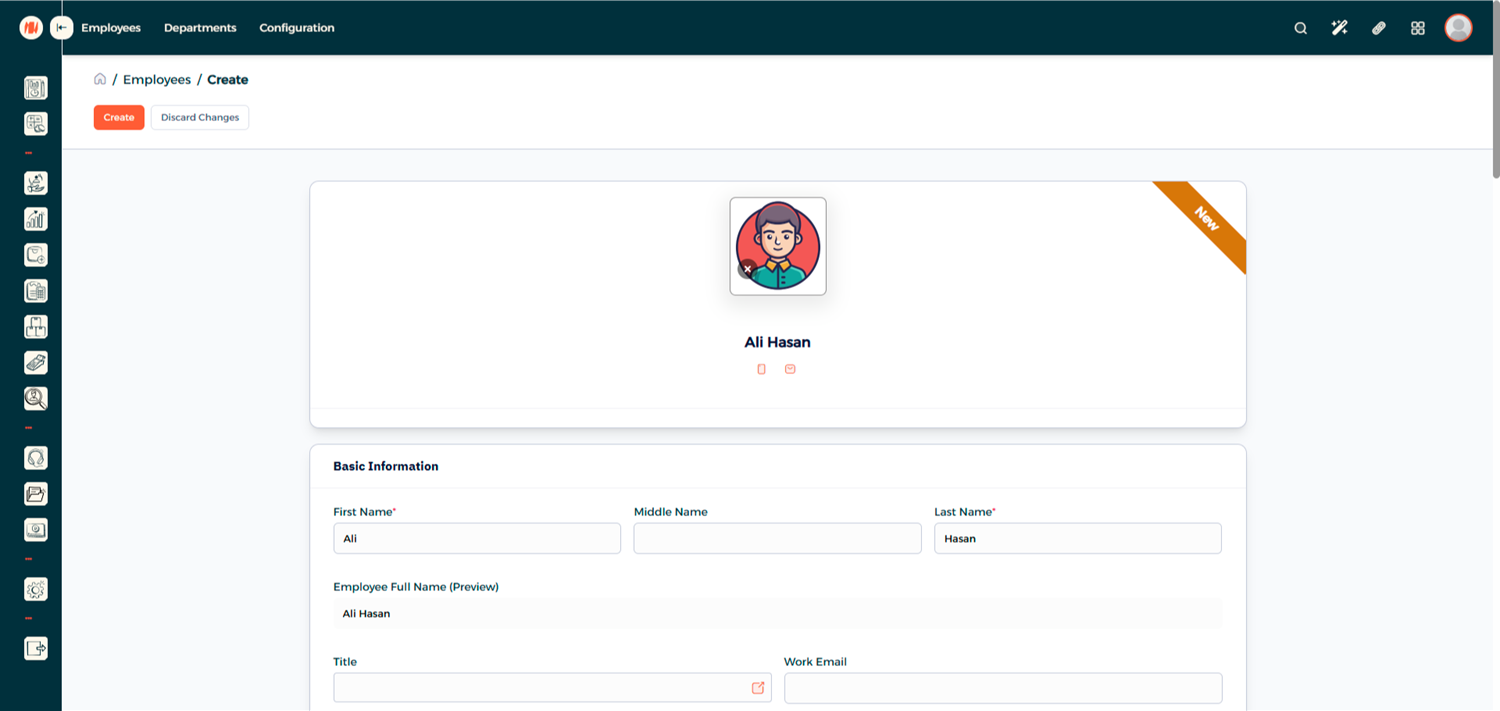
Step 6: Add a New Employee
From the Employees List, click Add to create a new Employee Profile
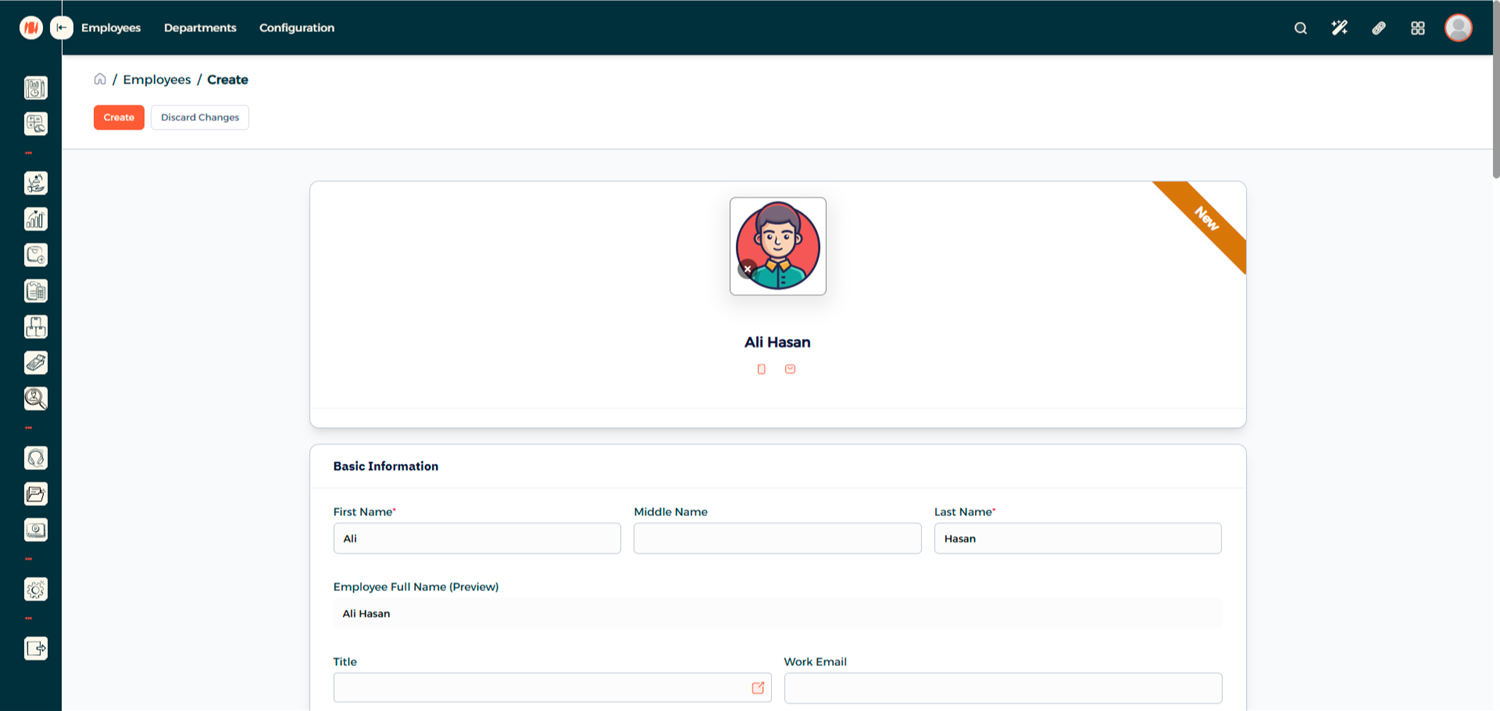
Step 7: Fill Out Employee Details
Step 8: Link the User Account
At the bottom of the page, Link the Employee to the User Account you created earlier
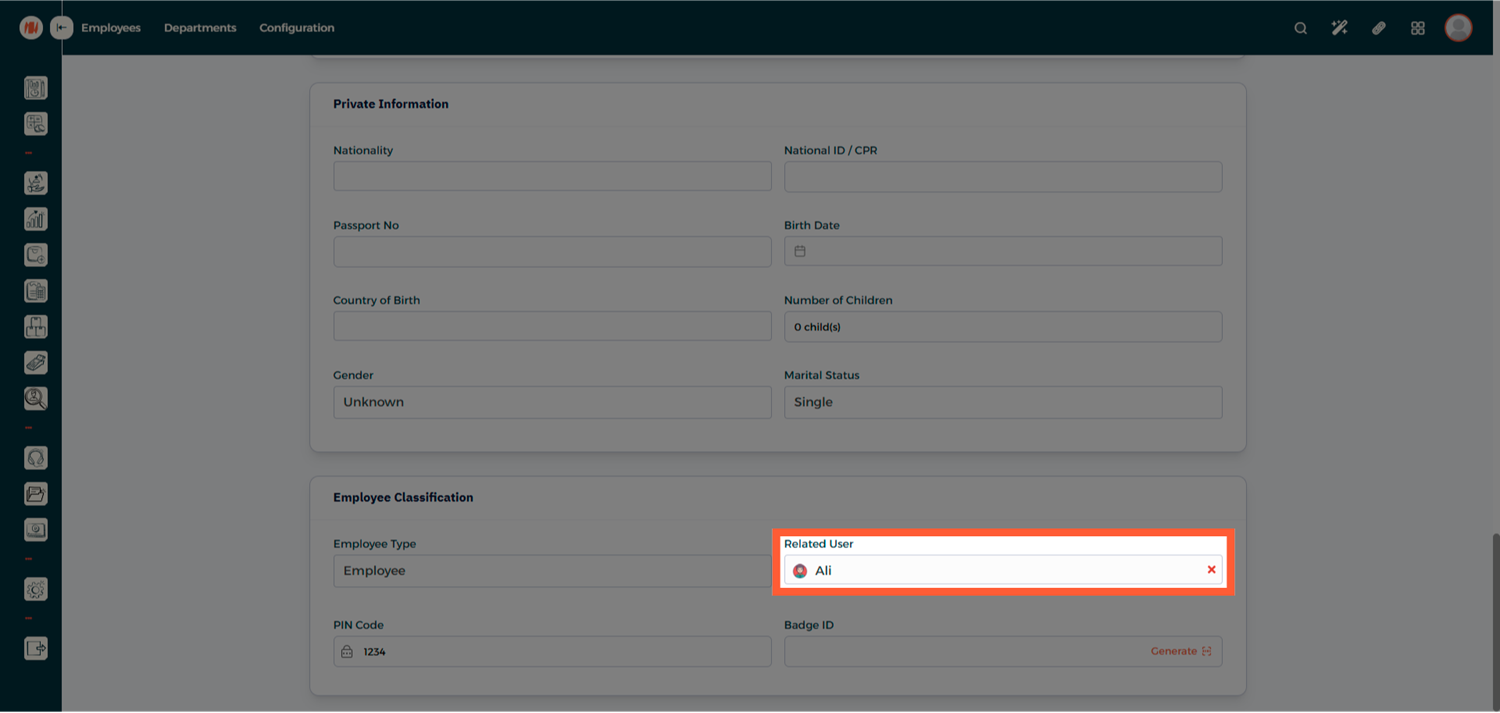
Step 9: Set a PIN Code (Optional)
Assign a PIN Code for quick and secure POS login
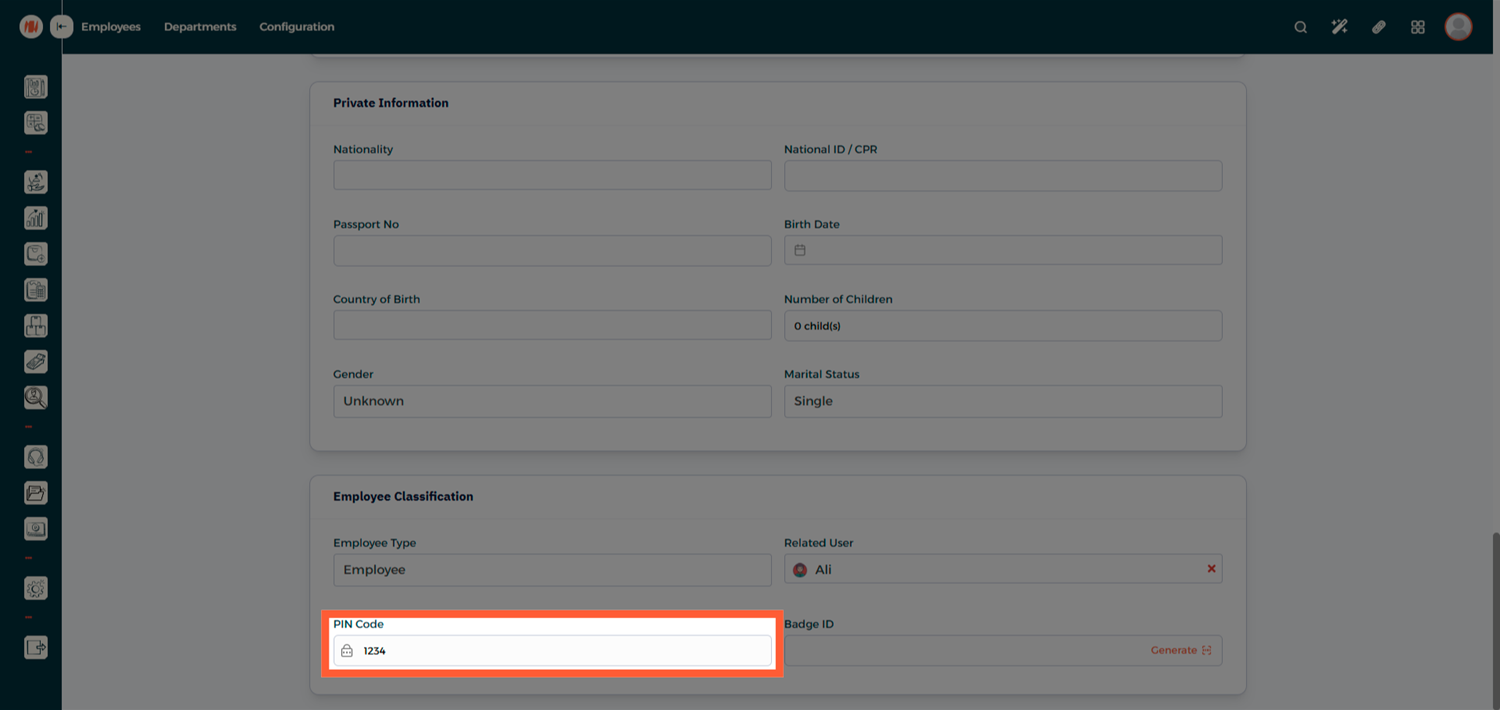
Step 10: Create the Employee
Click Create to save the Employee Profile
Assign the Employee to a POS Configuration
Step 11: Head to POS Configuration
From the Main Menu, go to Point of Sale → Configuration → POS Configuration
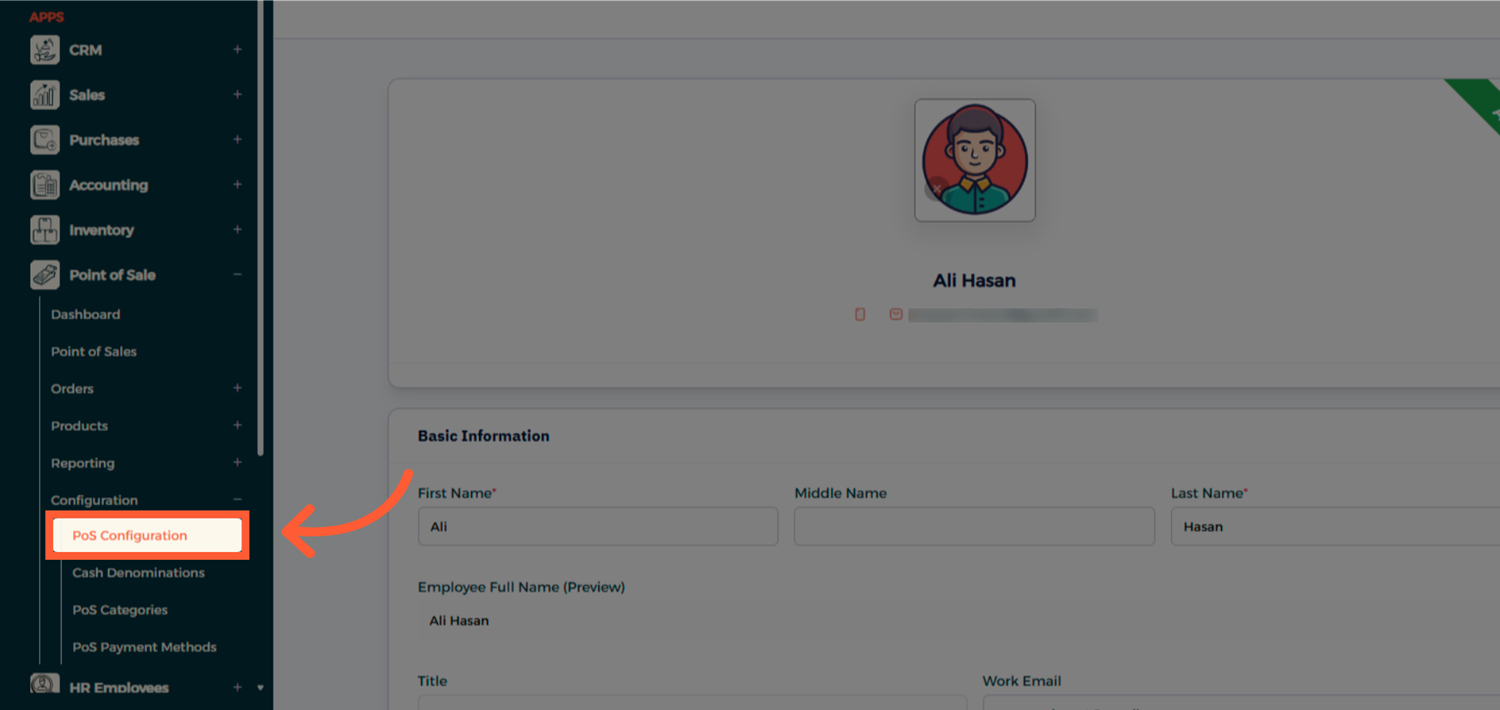
Step 12: View Available POS
You'll see a list of all available POS configurations in the system
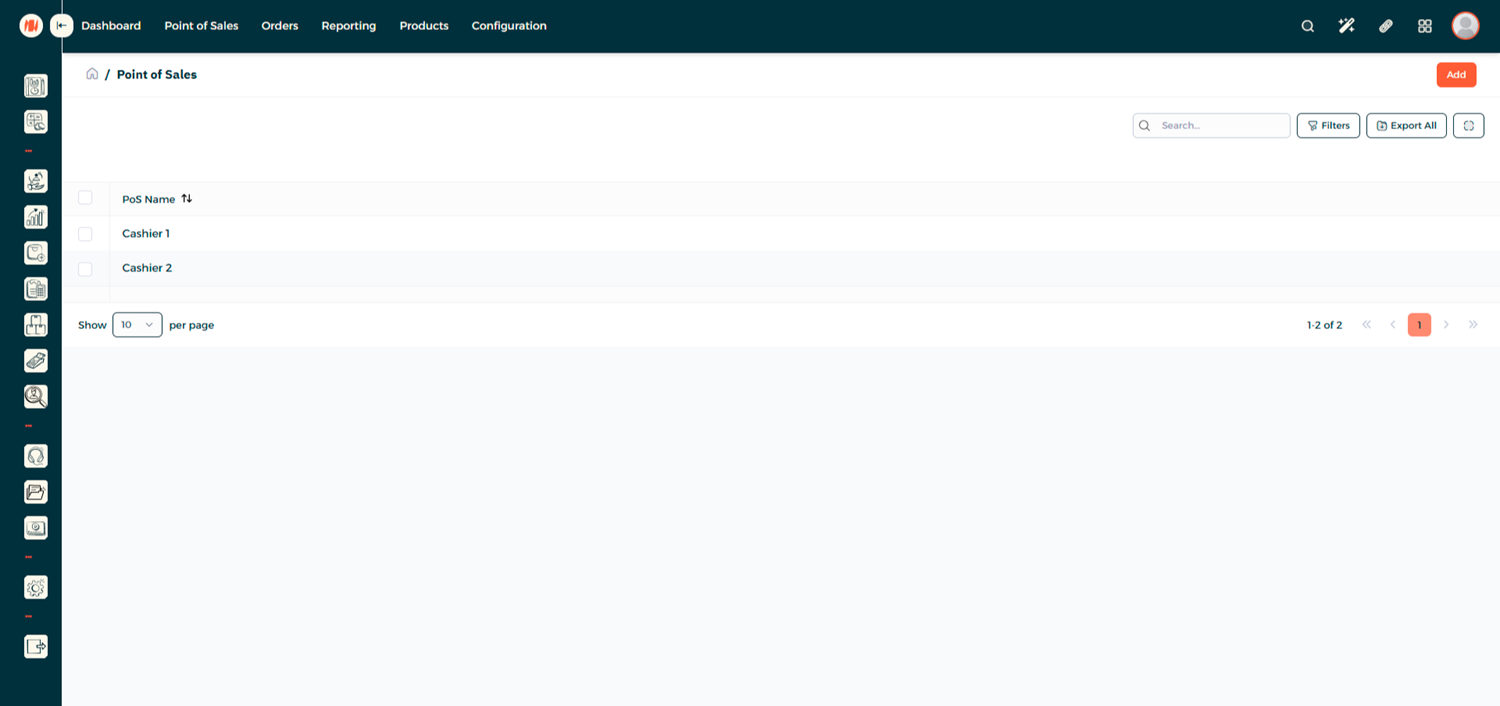
Step 13: Edit the Desired POS
Select the POS you want to assign the employee to and click Edit.
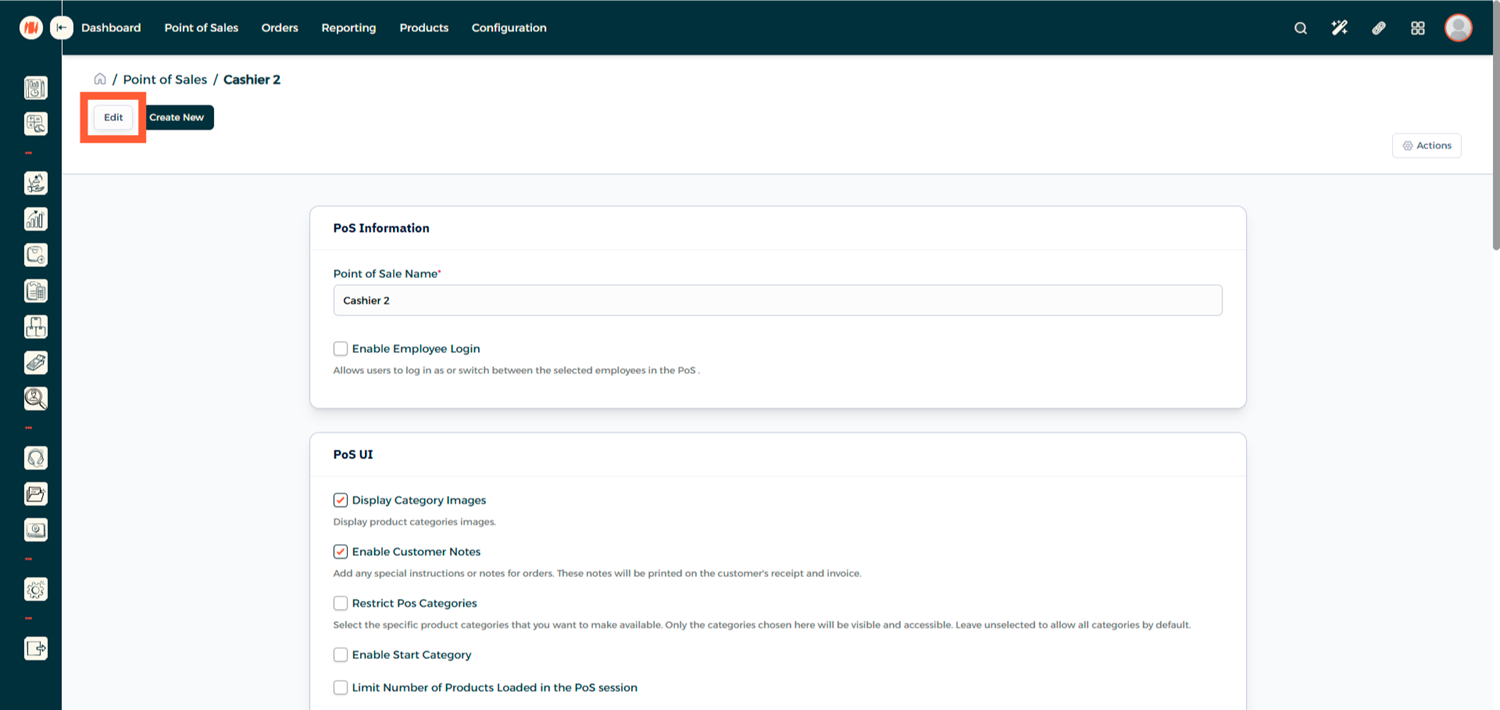
Step 14: Enable Employee Login
Enable Employee login, assign employees with the appropriate access level, then click Save
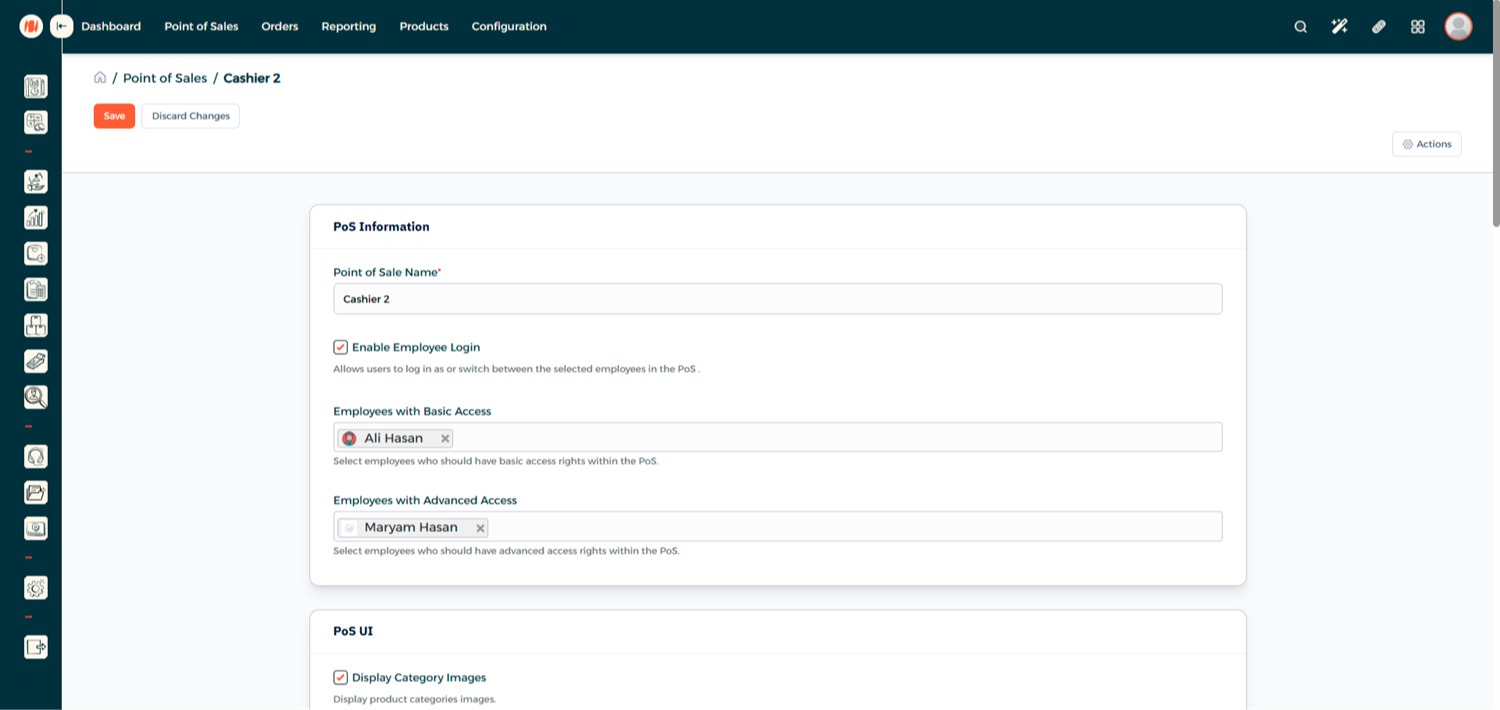
- Basic Access: Limited POS actions
- Advanced Access: Additional privileges such as closing the register
Login to POS as a POS User
Step 15: Open Point of Sale
From the Main Menu, go to Point of Sale → Point of Sales
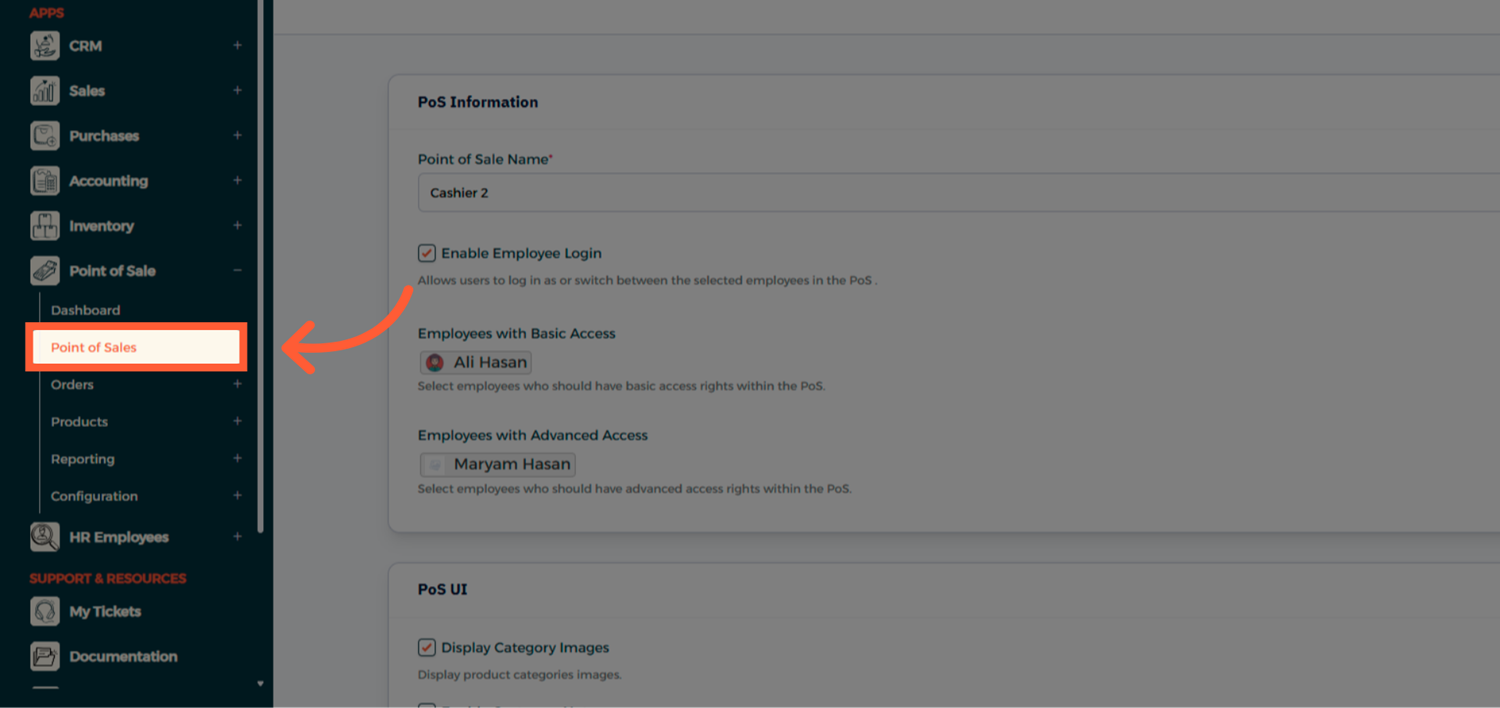
Step 16: Enter the POS Session
Select and enter your POS session
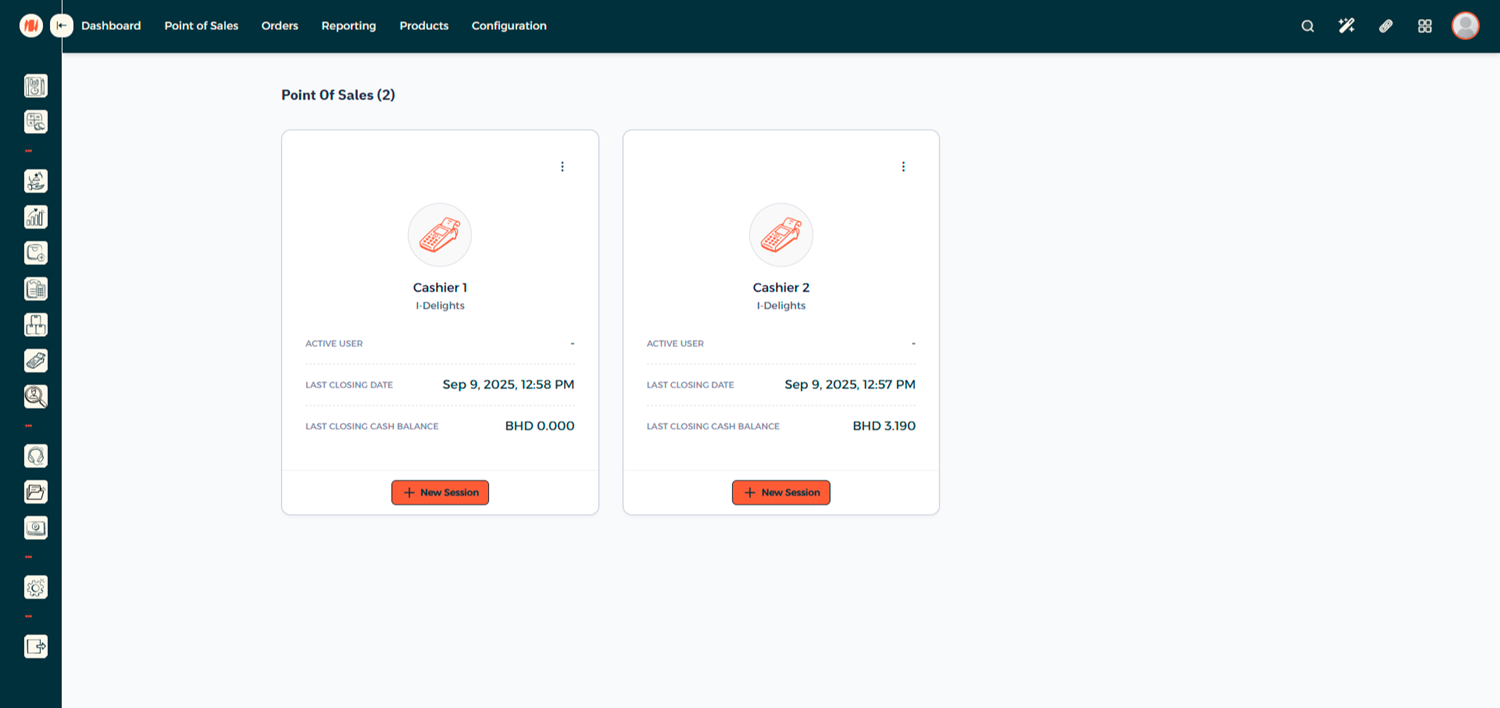
Step 17: Open the Register
You'll be prompted to either Open Register or return to the home screen

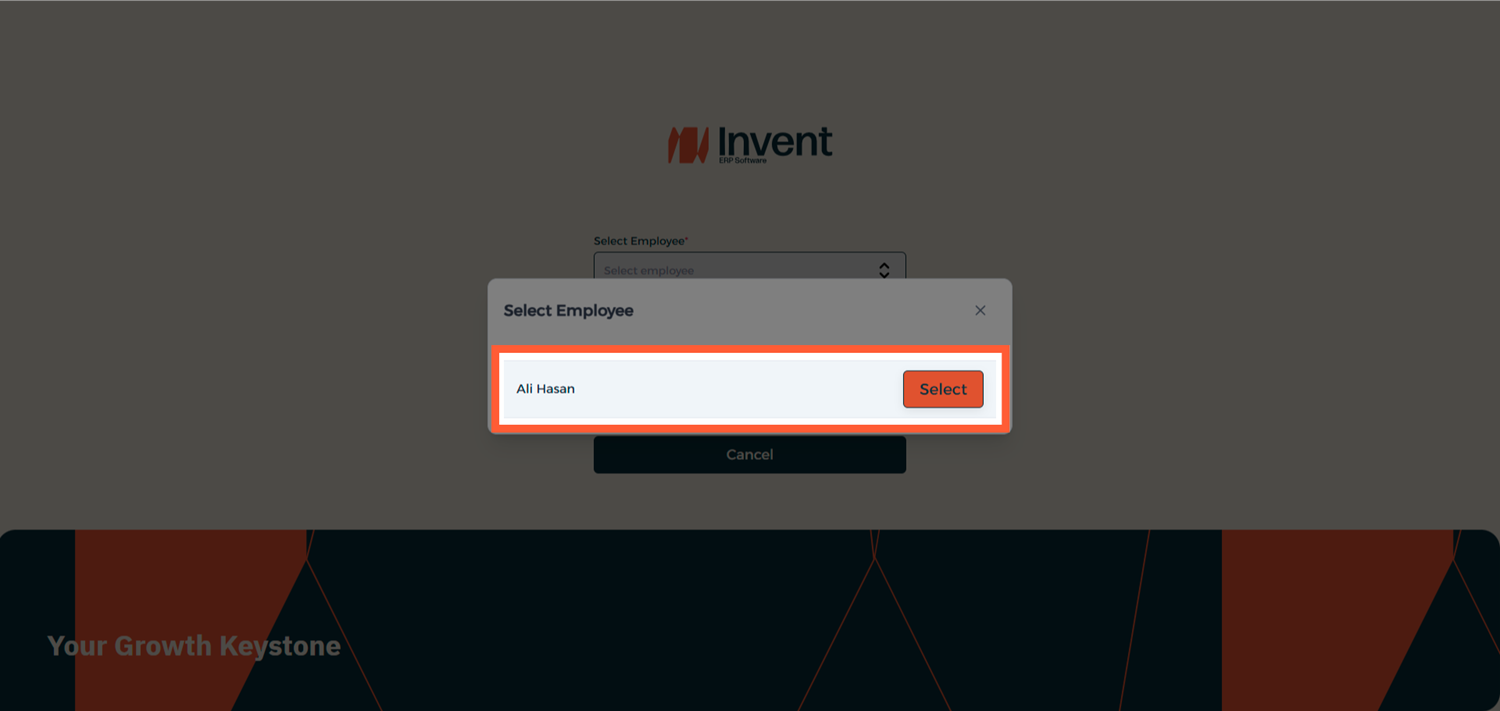
Step 18: Log In Using PIN Code
Select Open Register and enter the employee PIN Code to begin using the POS, and that's it!
Notes & Tips
- Always create unique user accounts for each employee to track individual performance and accountability.
- PIN codes make it faster for the team to switch between users at a busy POS counter.
FAQ
Q: Can one employee be assigned to multiple POS configurations? Yes an employee can be assigned to multiple POS configurations.
Q: Can a POS User access other modules? No a POS User can only access the POS sessions assigned to them.
Q: Can I change an employee's PIN Code later? Yes, you can update or reset the PIN Code at any time from the employee profile