How to Record and Manage Supplier Bills in Invent ERP
Learn how to create vendor bills, track supplier balances, and manage accounts payable.
Step-by-Step Process
Step 1: Navigate to Vendor Bills
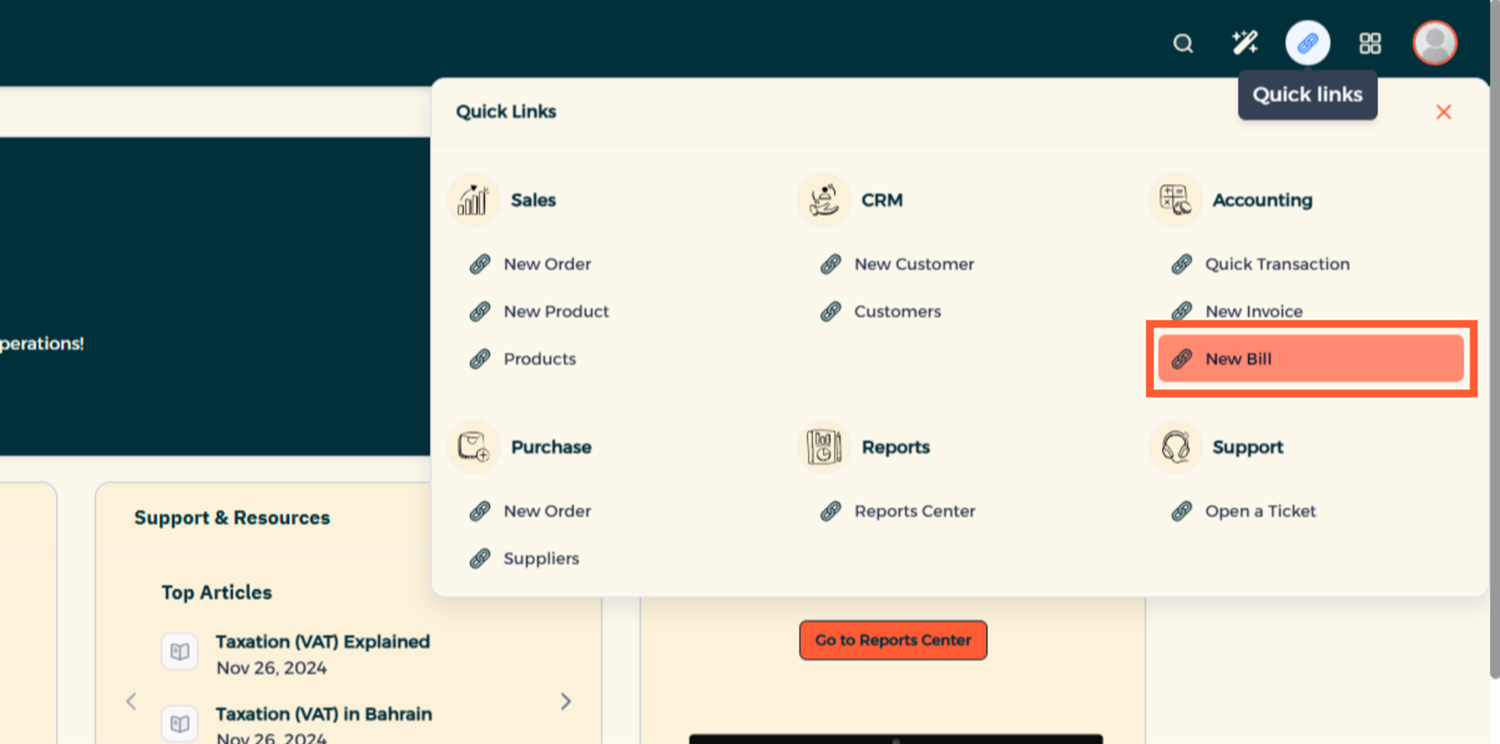
From the Main Menu, head to Accounting → Vendors → Vendor Bills. Or from Quick Links, click New Bill.
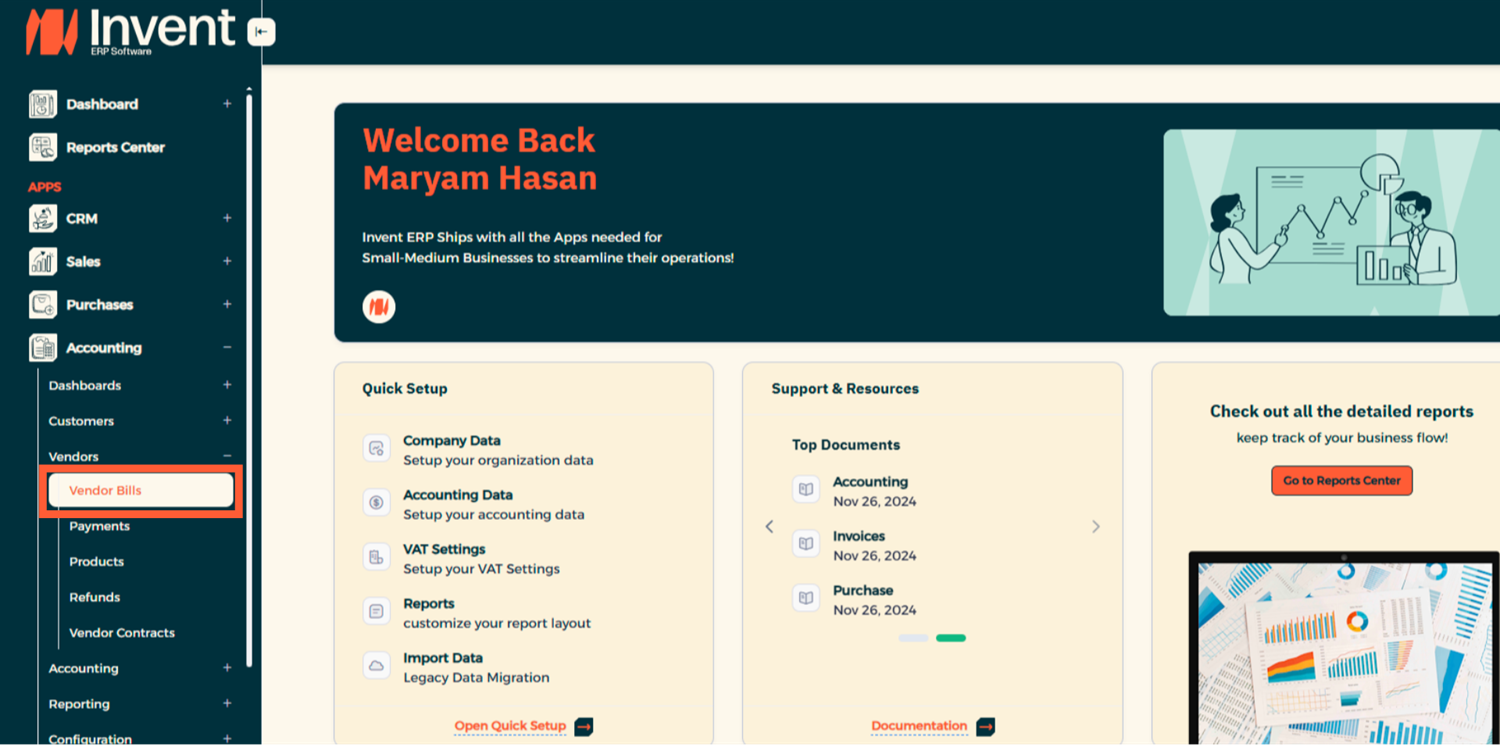
Or from Quick Links, click New Bill.
Step 2: Create a New Vendor Bill
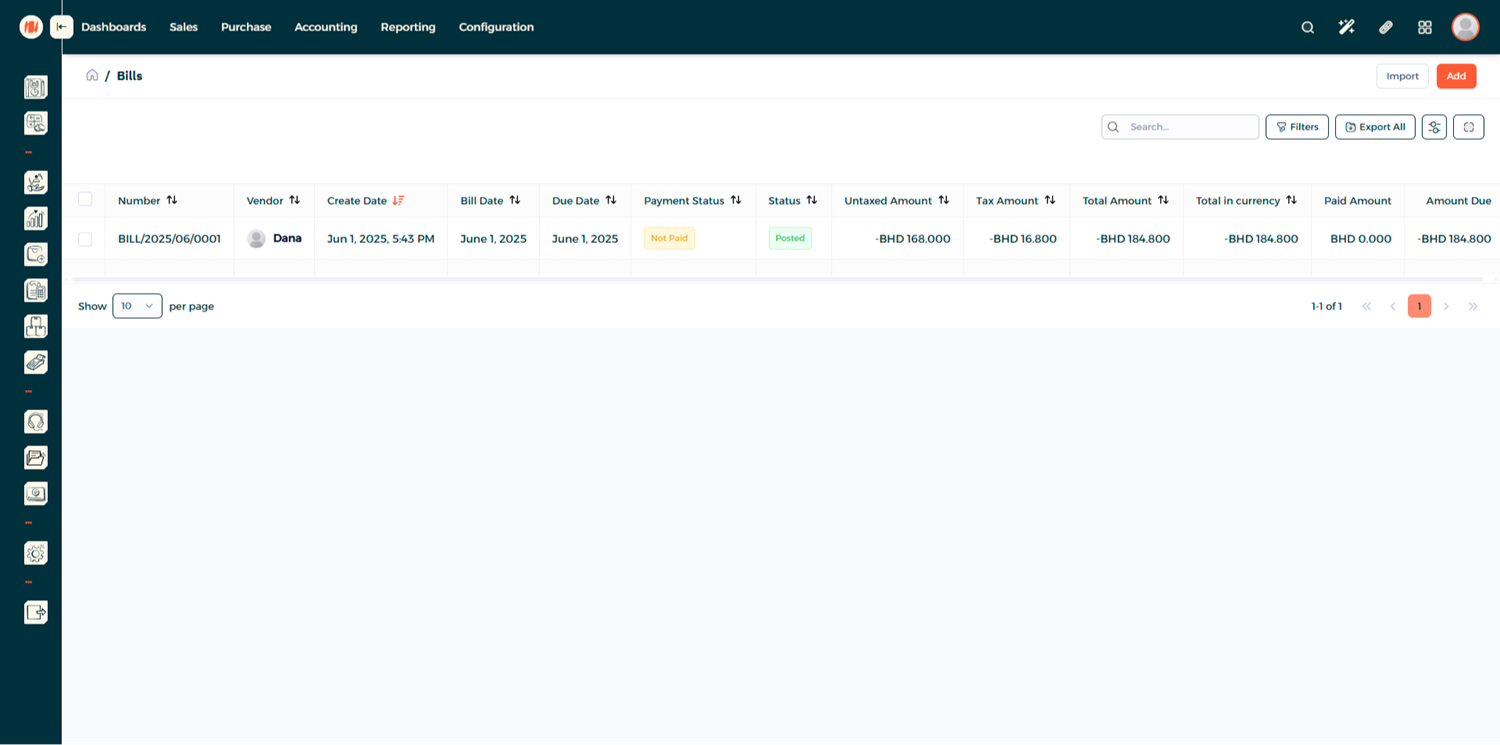
Here, you can view all existing vendor bills along with their amounts and current statuses. Click Add to create a New Vendor Bill.
Step 3: Add Details
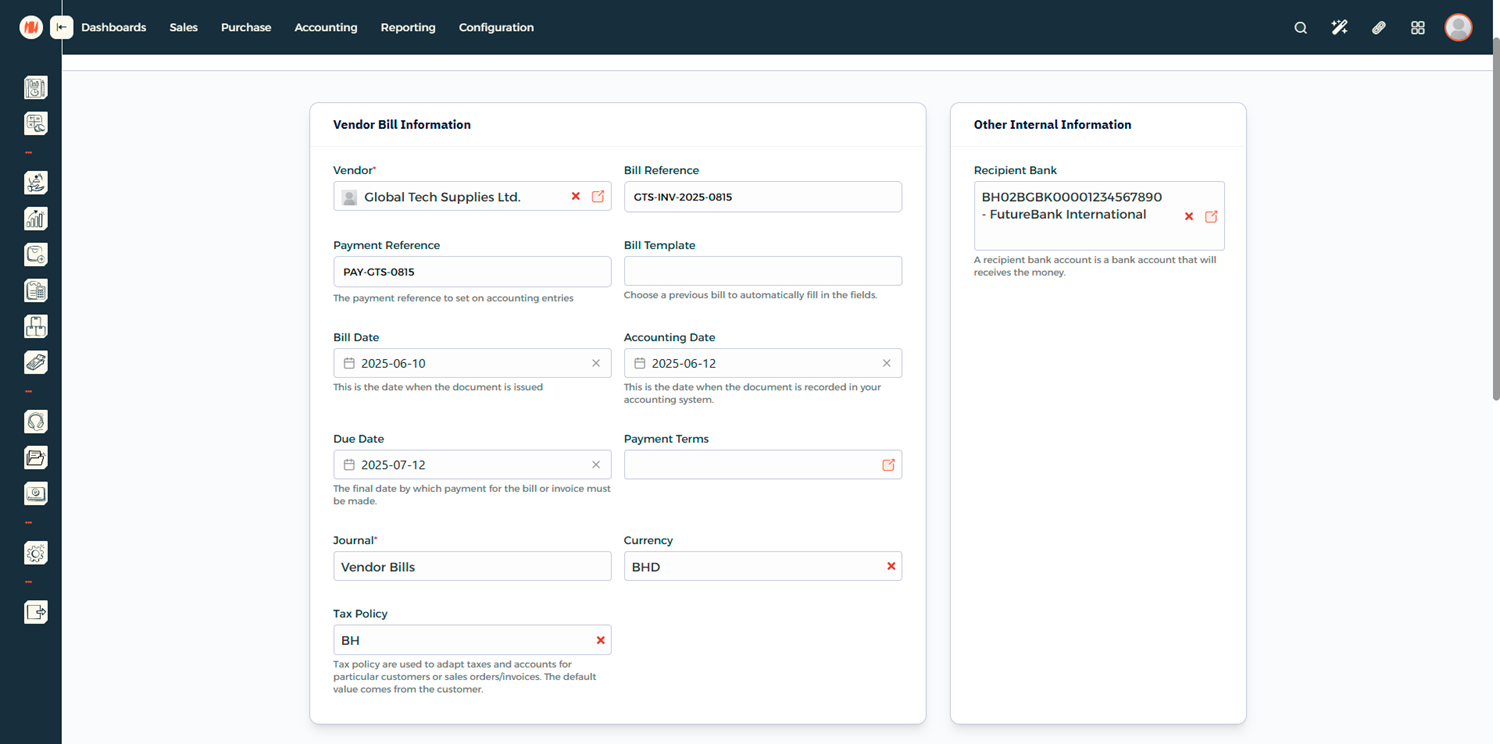
Fill in the Vendor Bill Information and any other internal information.
Step 4: Add Vendor Bill Items
Add the products and services being billed.
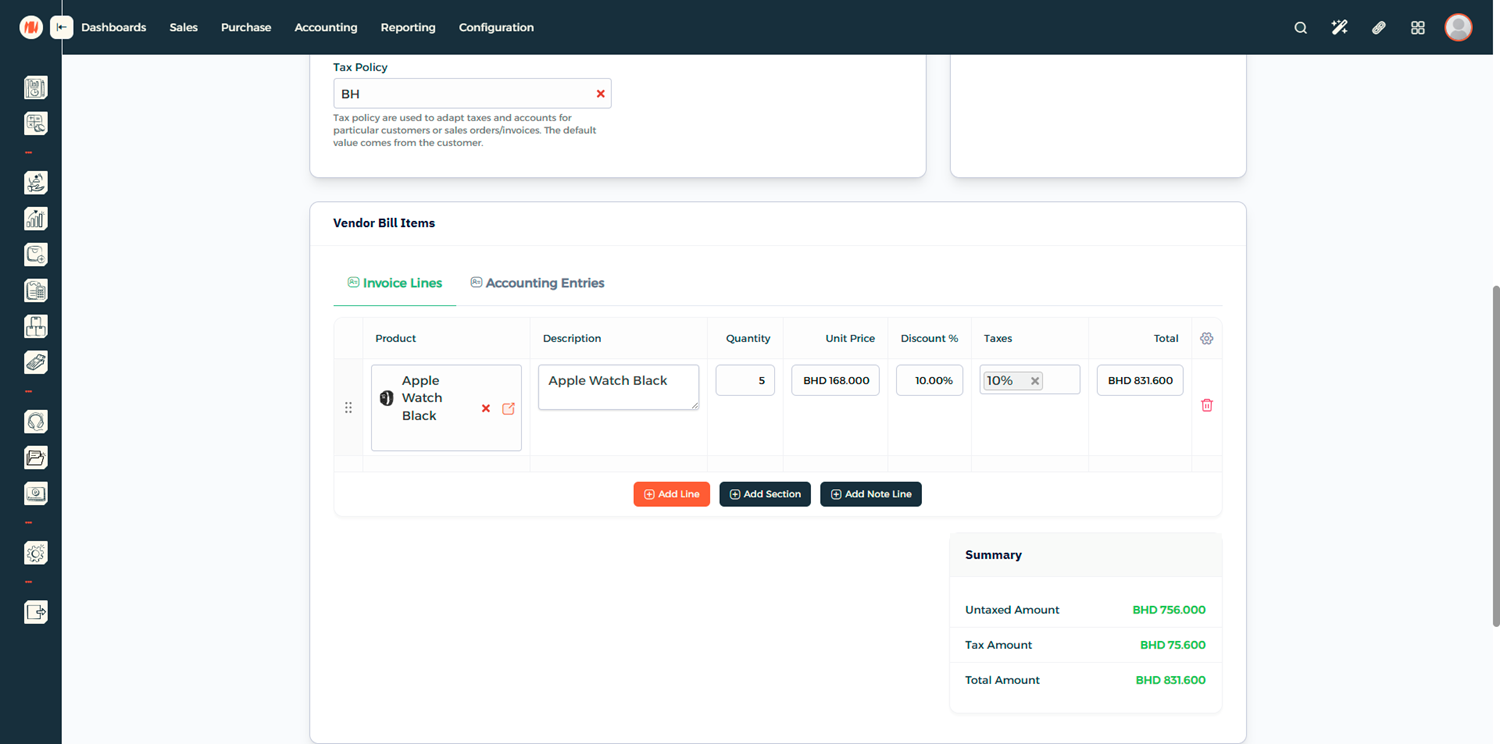
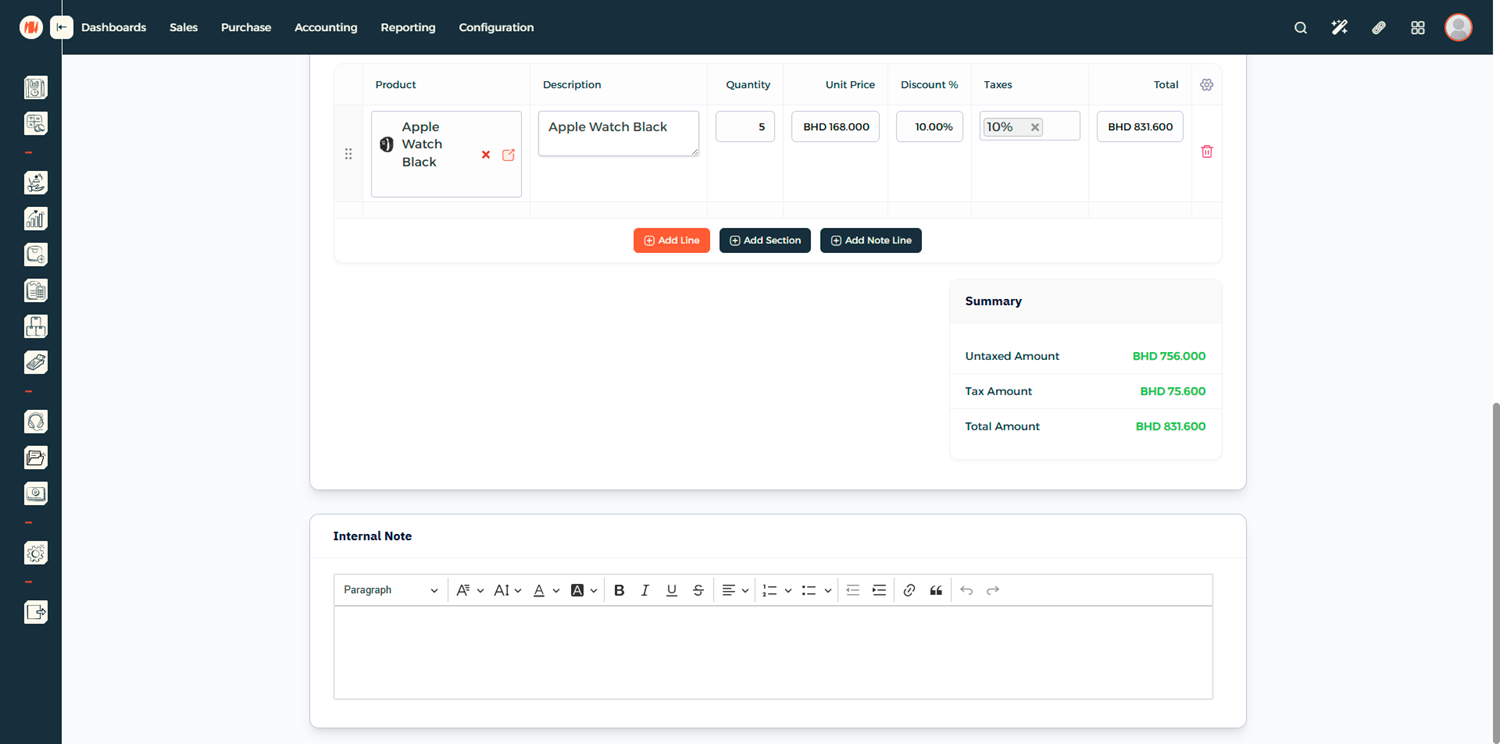
Step 5: Add Internal Note (Optional)
Include any relevant internal notes for reference.
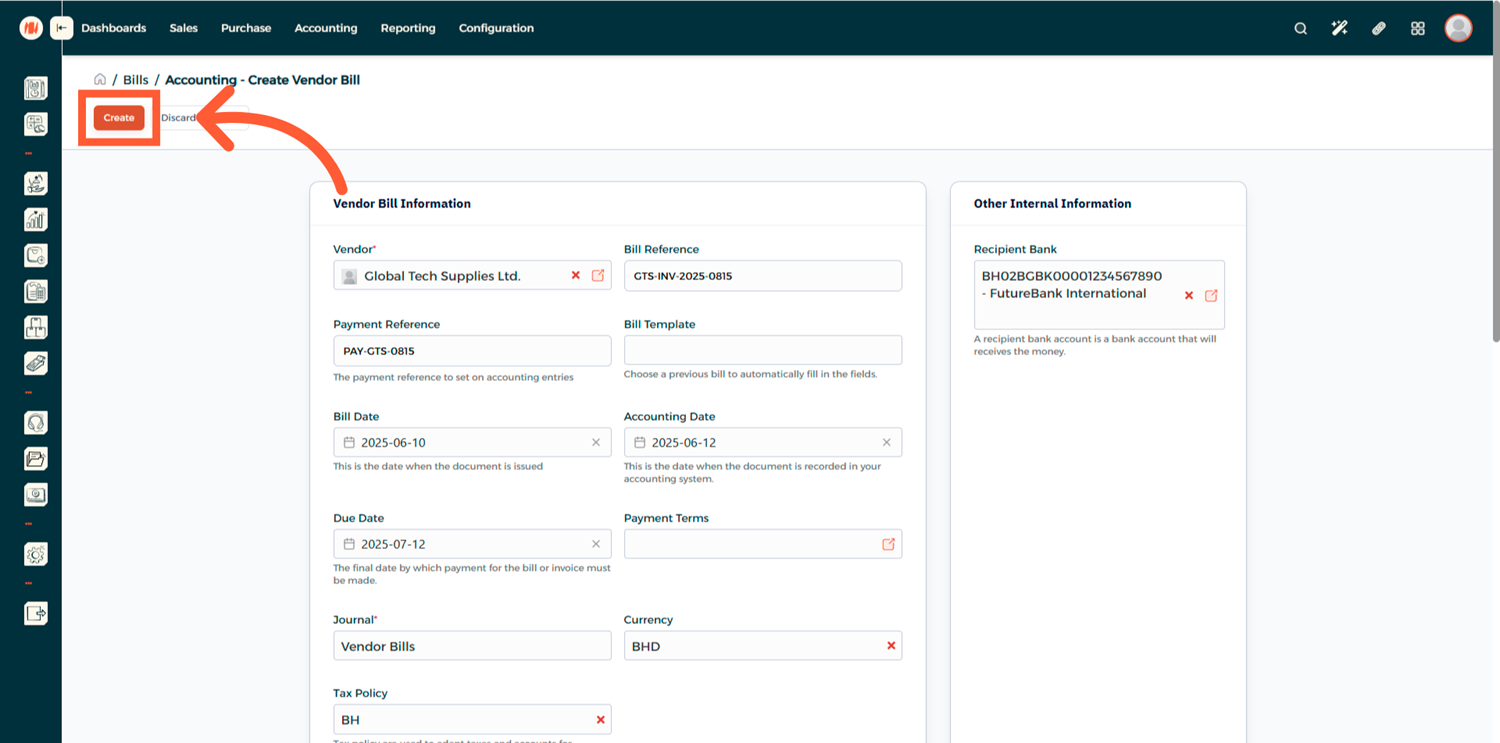
Step 6: Save the Vendor Bill
Once all details are entered and reviewed, click Create to save the bill.
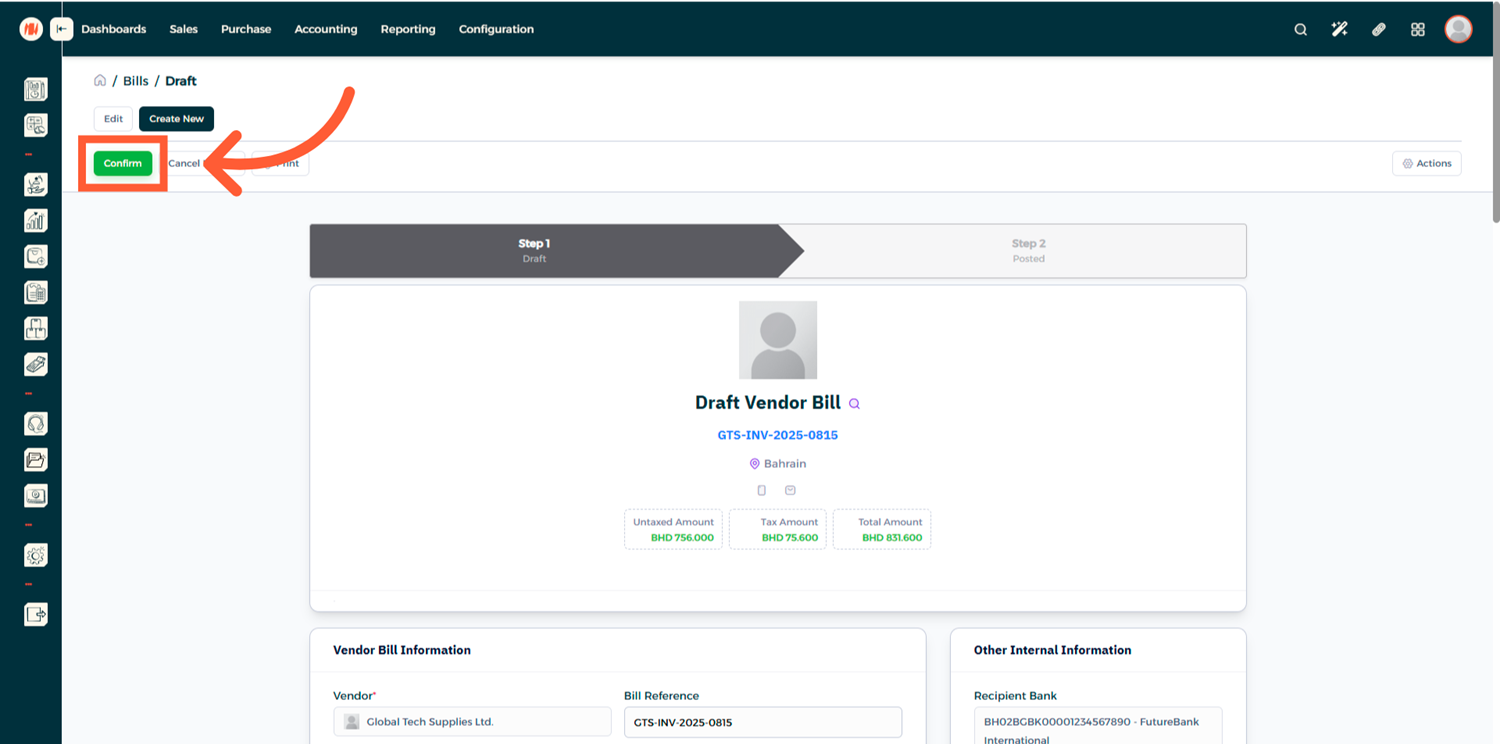
Step 7: Confirm the Vendor Bill
When you're ready, click Confirm to finalize the bill.
Step 8: Register a Payment
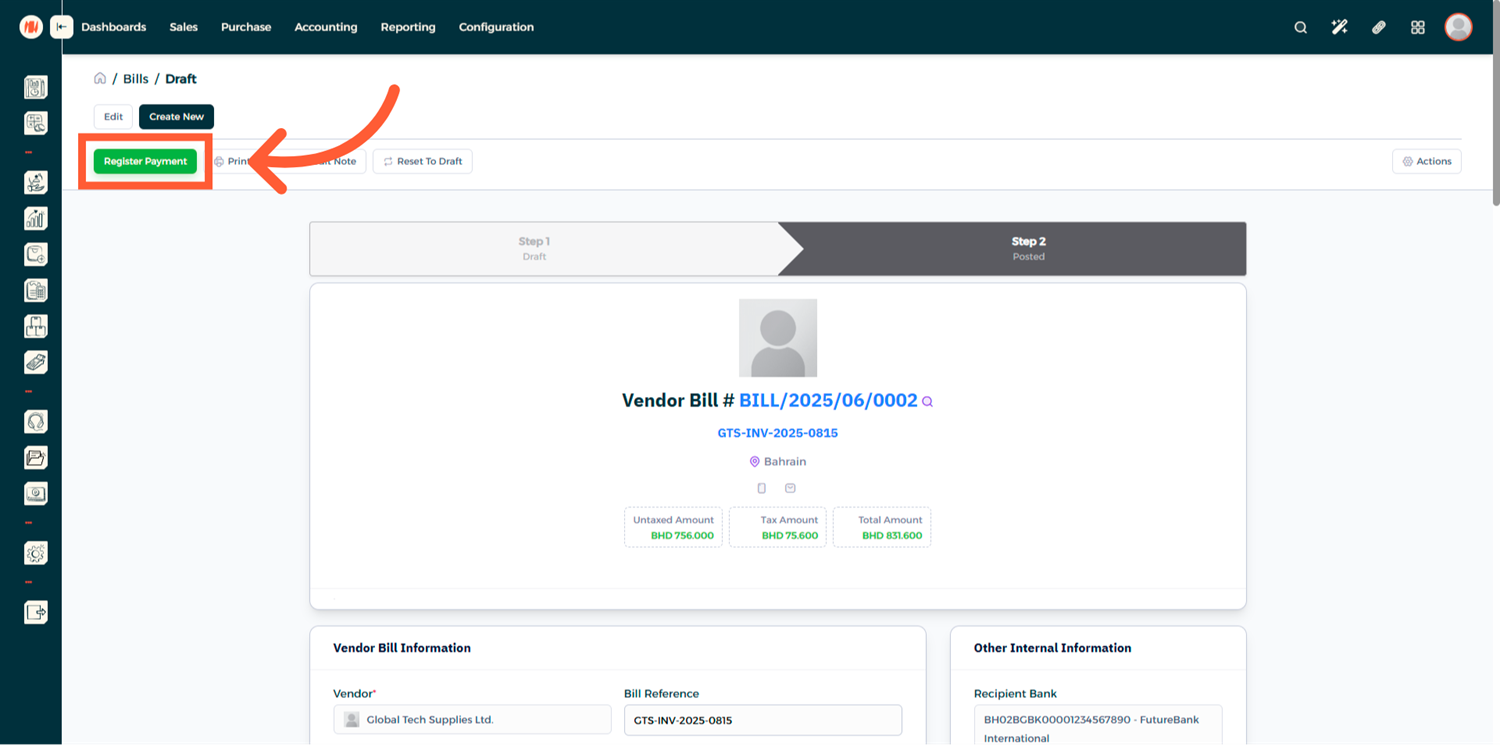
To record a payment, click Register Payment and enter the payment details.
Notes & Tips
- Always review bills in Draft mode before confirming to avoid errors.
- Using Bill Templates helps standardize vendor billing and saves time.
- Partial payments can be recorded until the bill is fully settled.
FAQ
Q: Can I record partial payments for a vendor bill? Yes. The remaining balance will stay open until fully paid.
Q: Can I edit a vendor bill after confirming it? Yes. You can reset the bill to Draft mode, make changes, and reconfirm it.
Q: Can I add a credit note to a vendor bill? Yes. Credit notes can be issued directly from the vendor bill.